Change font Size and More
If you have the full version of Final Exhibits 2, you can change the font size of the individual rows of text as below:
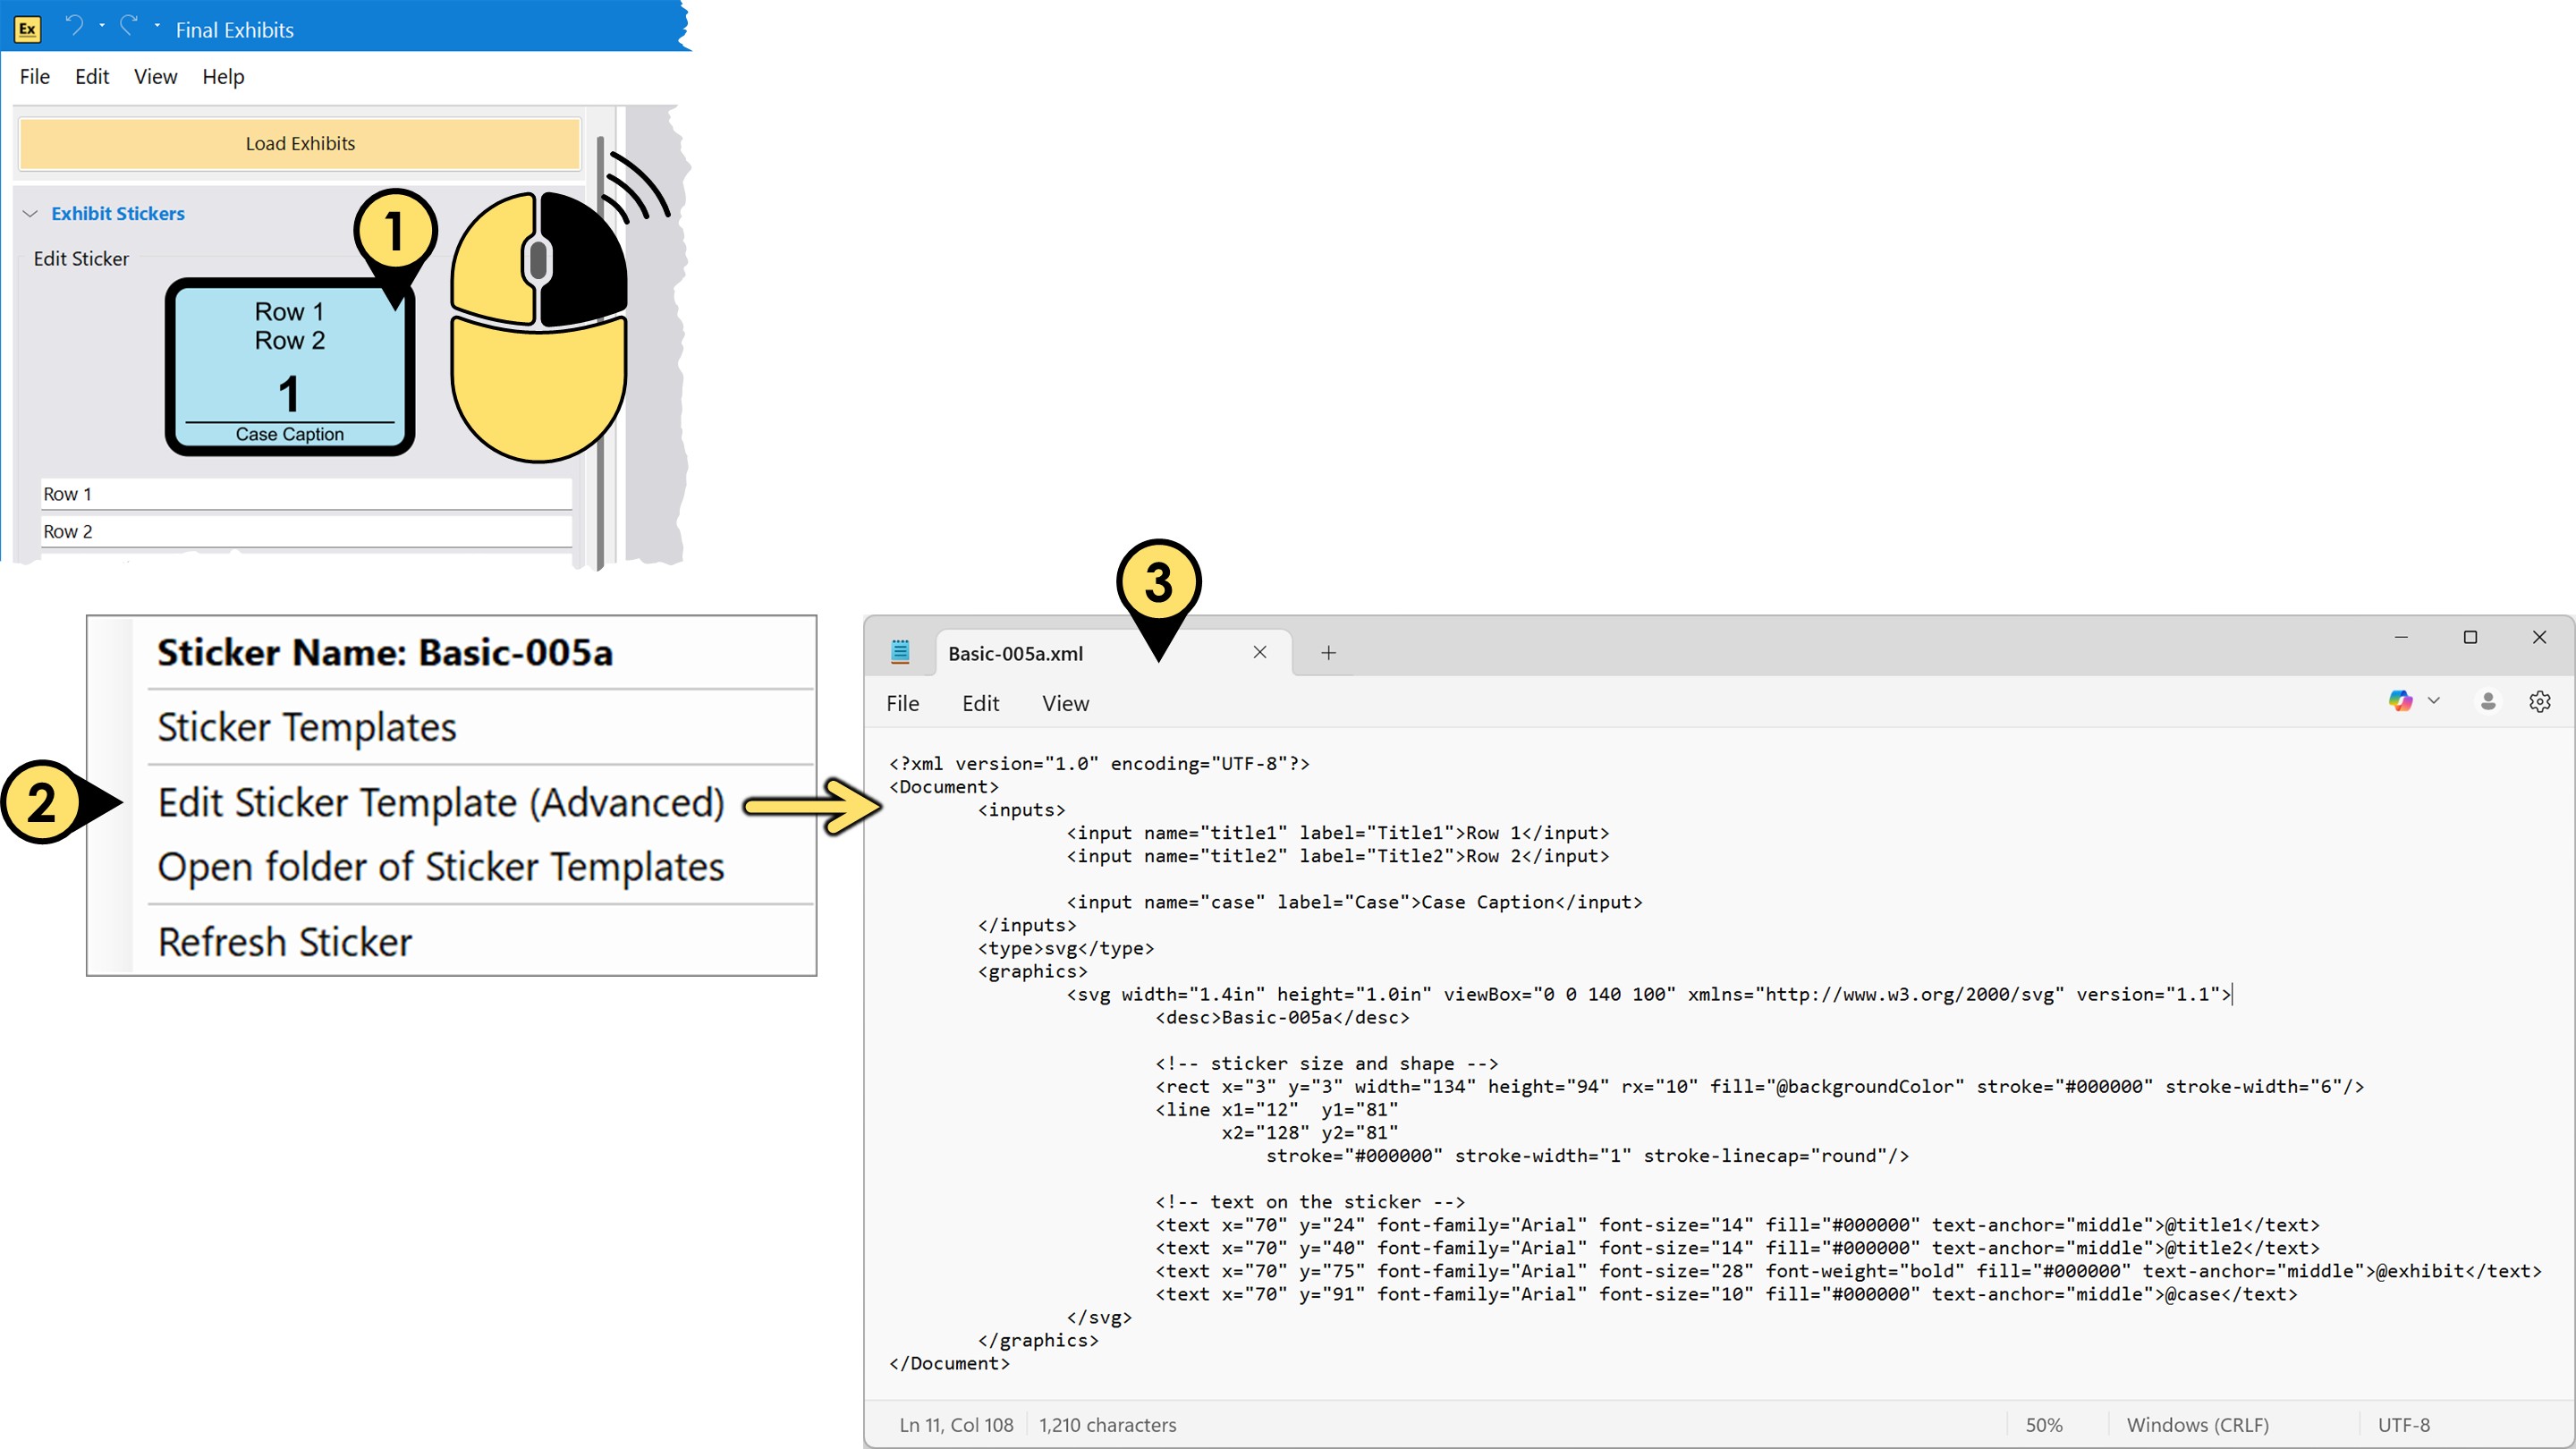
- Right-click your exemplar sticker.
- Click the Edit Sticker Template (Advanced) option
- The XML file describing that sticker will open in Notepad.

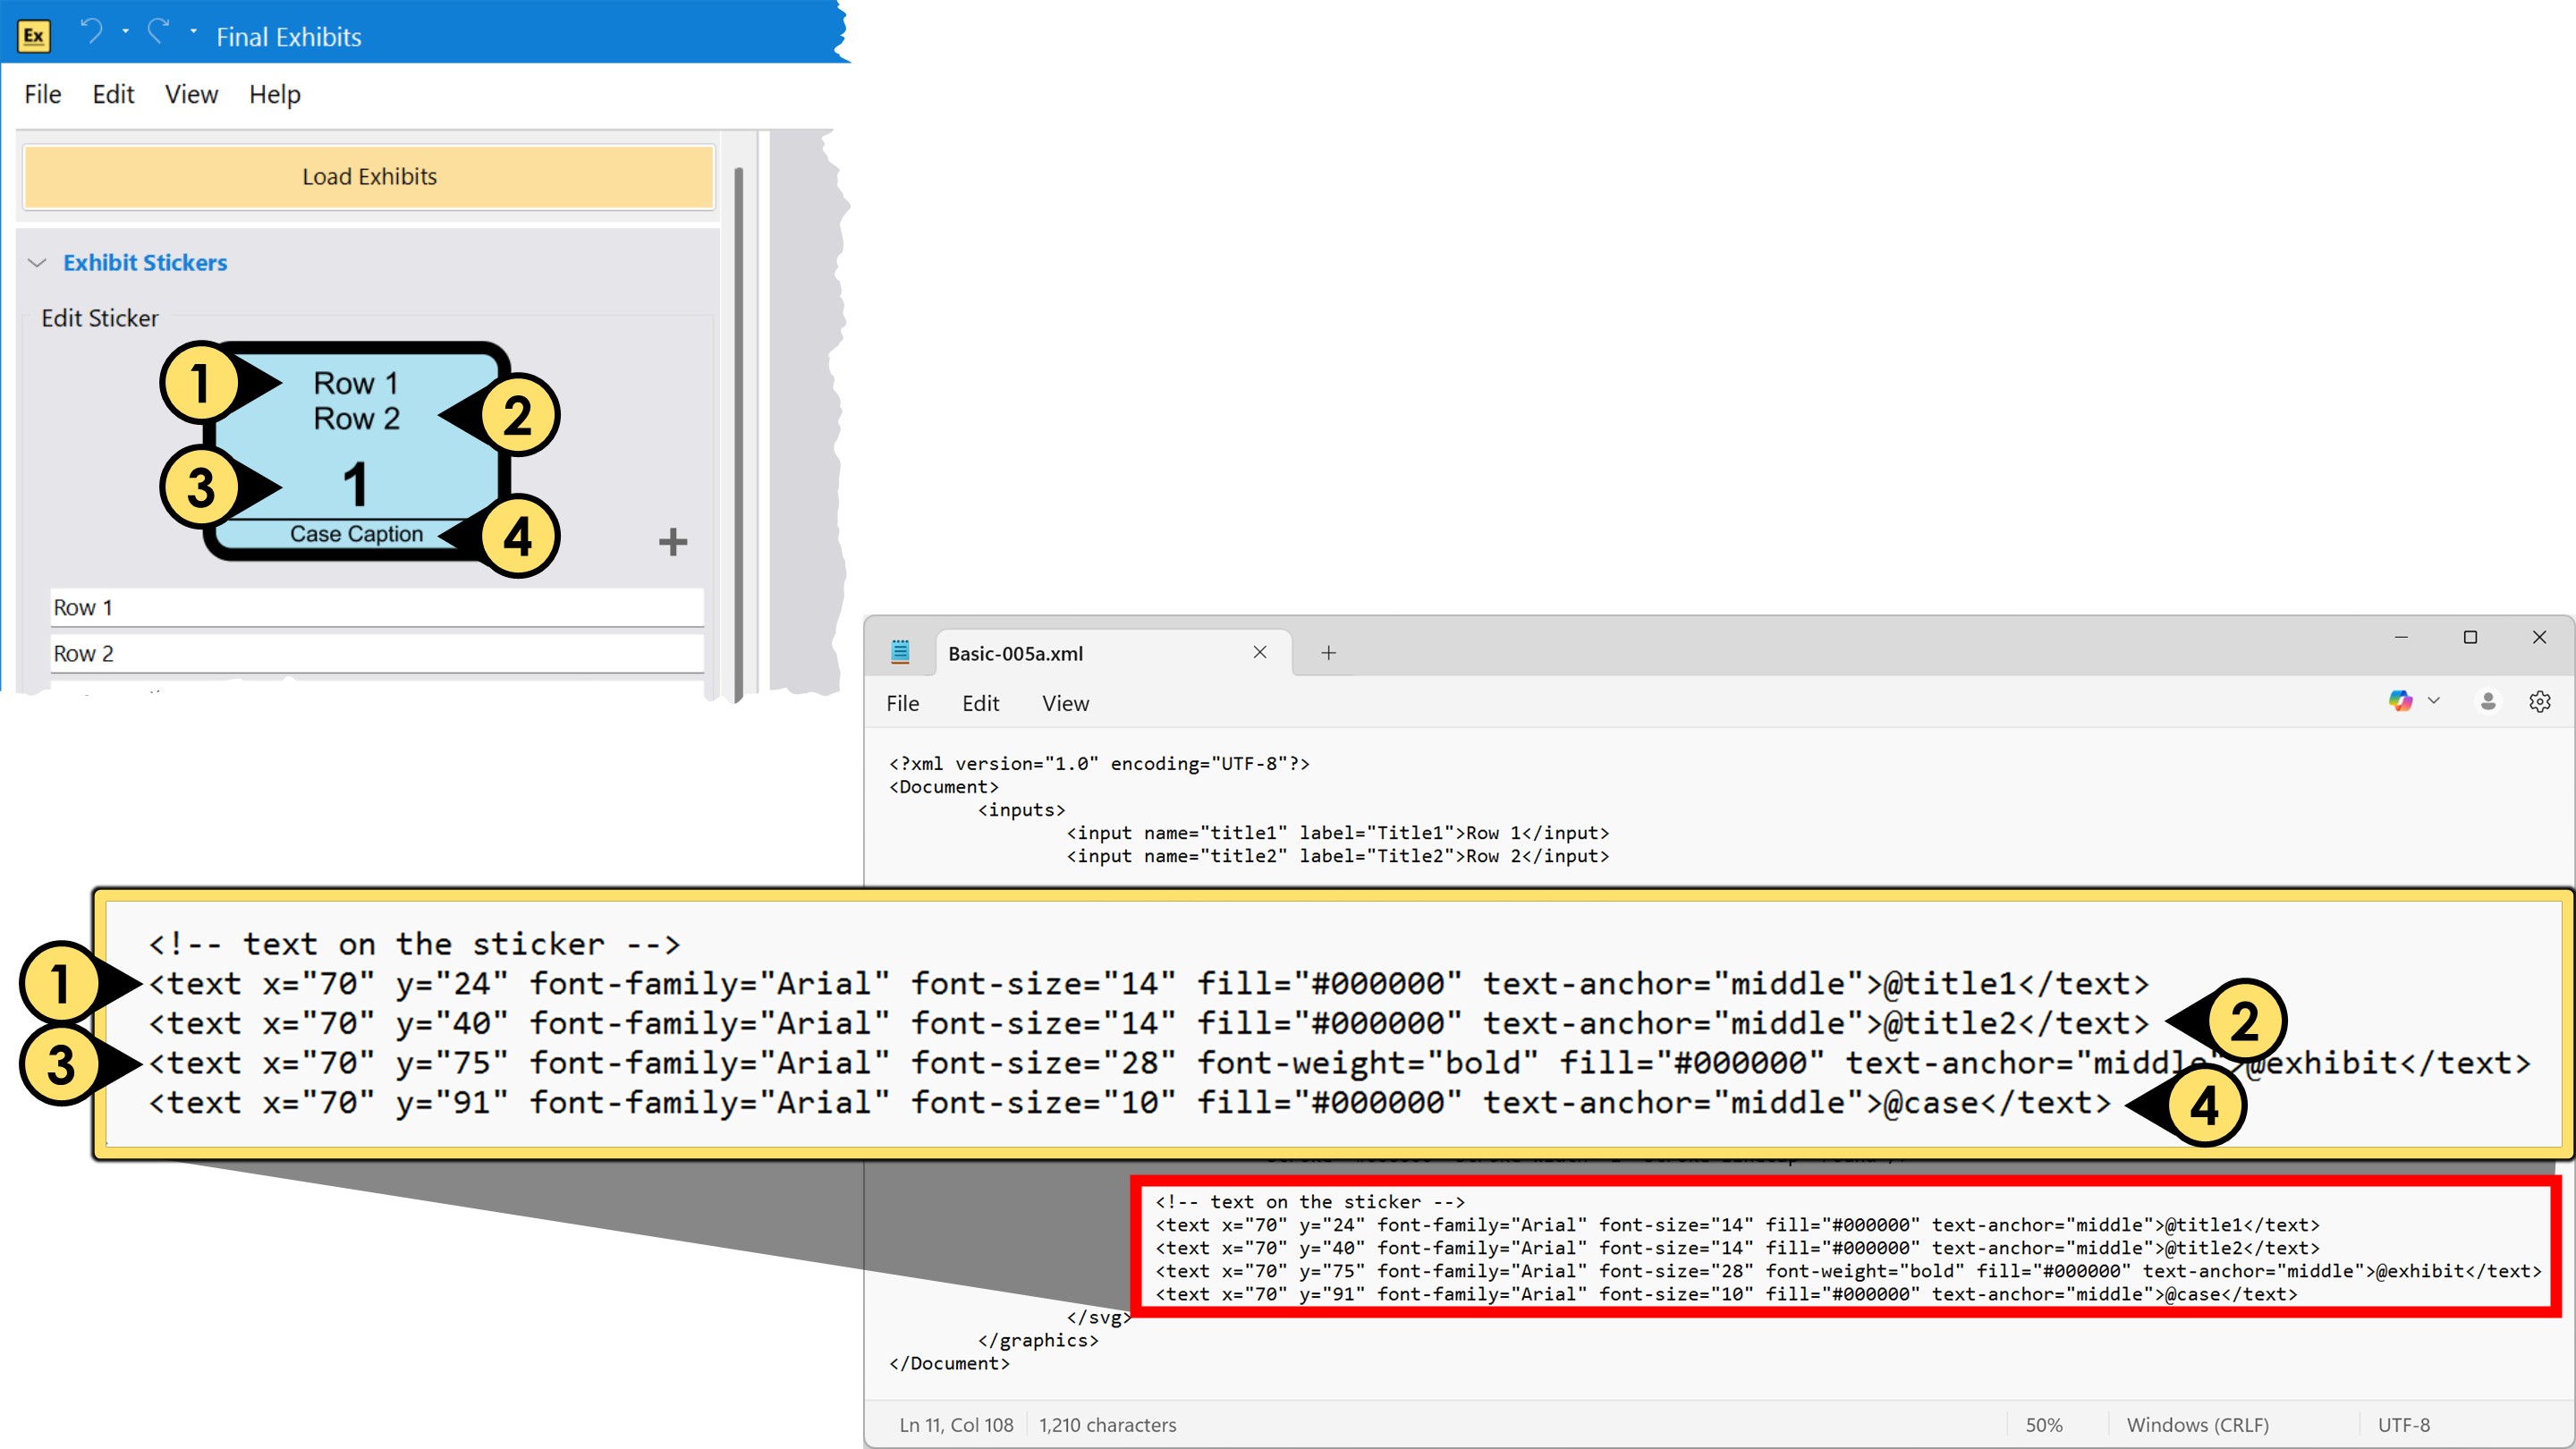
Look for the block of text in the XML file <!-- text on the sticker --> or something very similar. Directly beneath that header, note how there are rows of text in format <text......>@title1</text>. Each of these rows describe the text on the exemplar sticker.

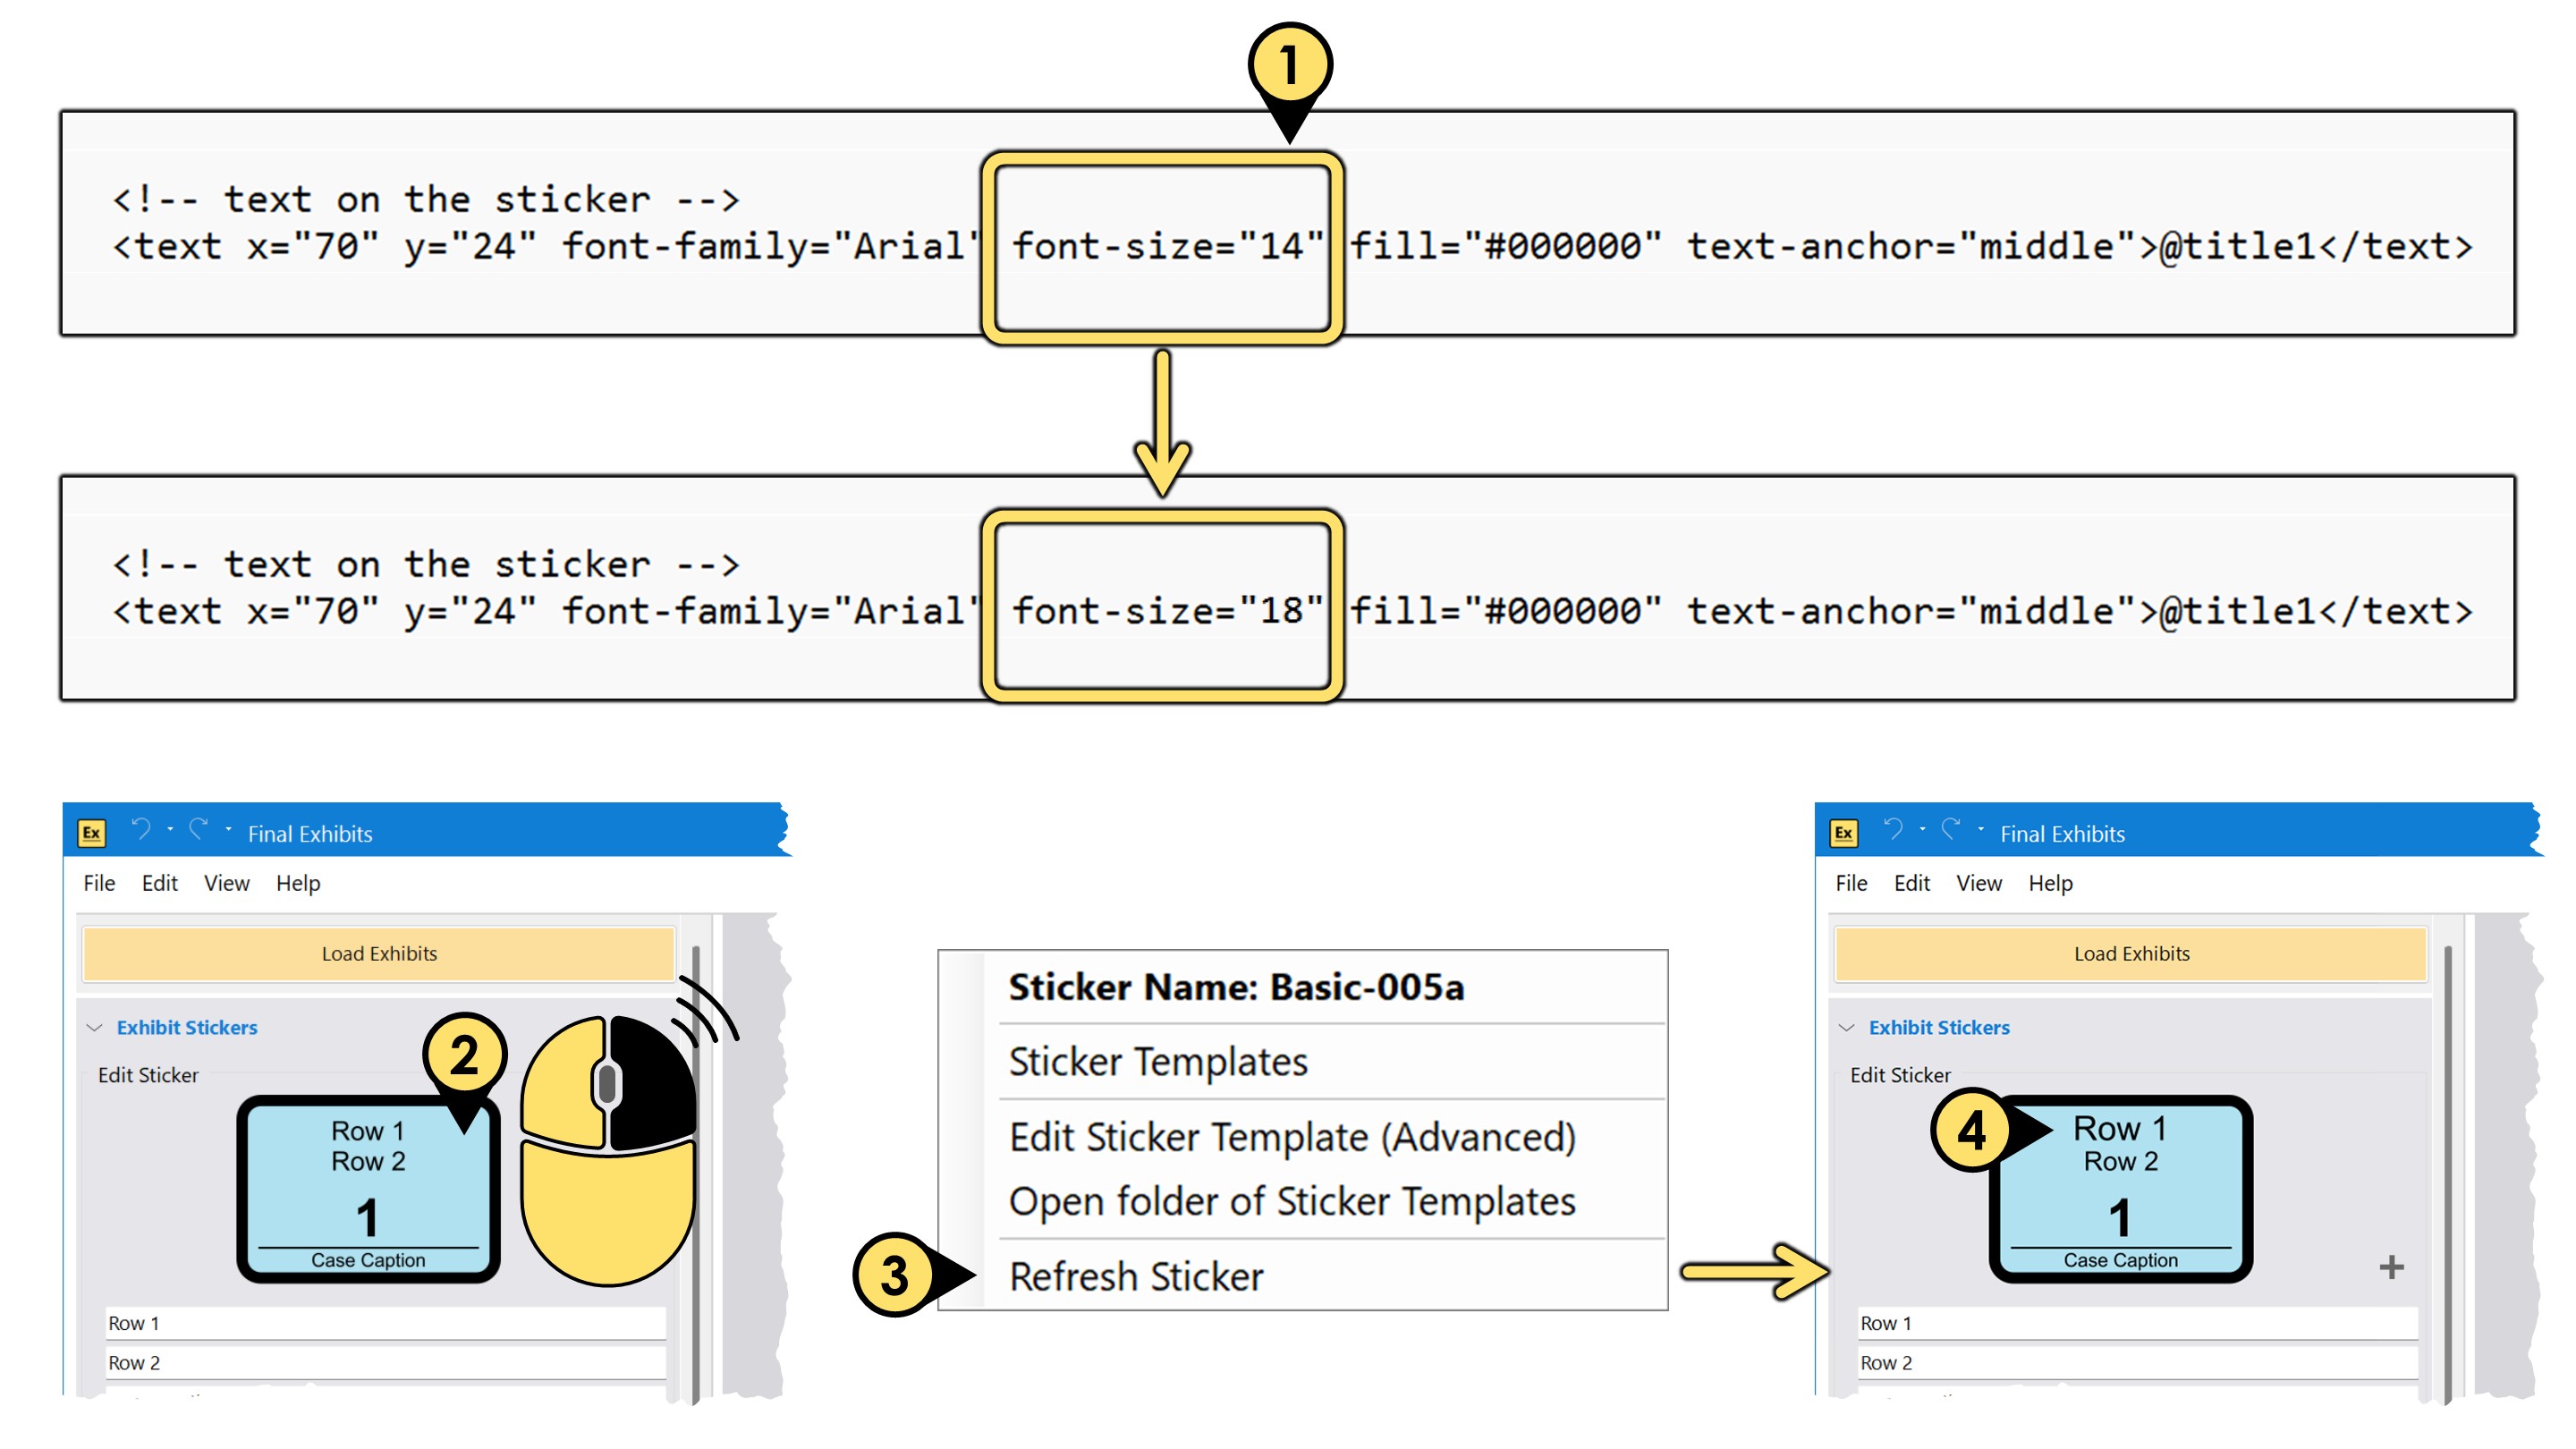
In this example, we are going to change the font-size of the first row of text on the sticker.
- Change
font-size="14" to font-size="18"and SAVE the XML file. - Right-click the exemplar sticker, and
- Click Refresh Sticker
- Note how the exemplar sticker has been updated to reflect your change.

Other available changes include:
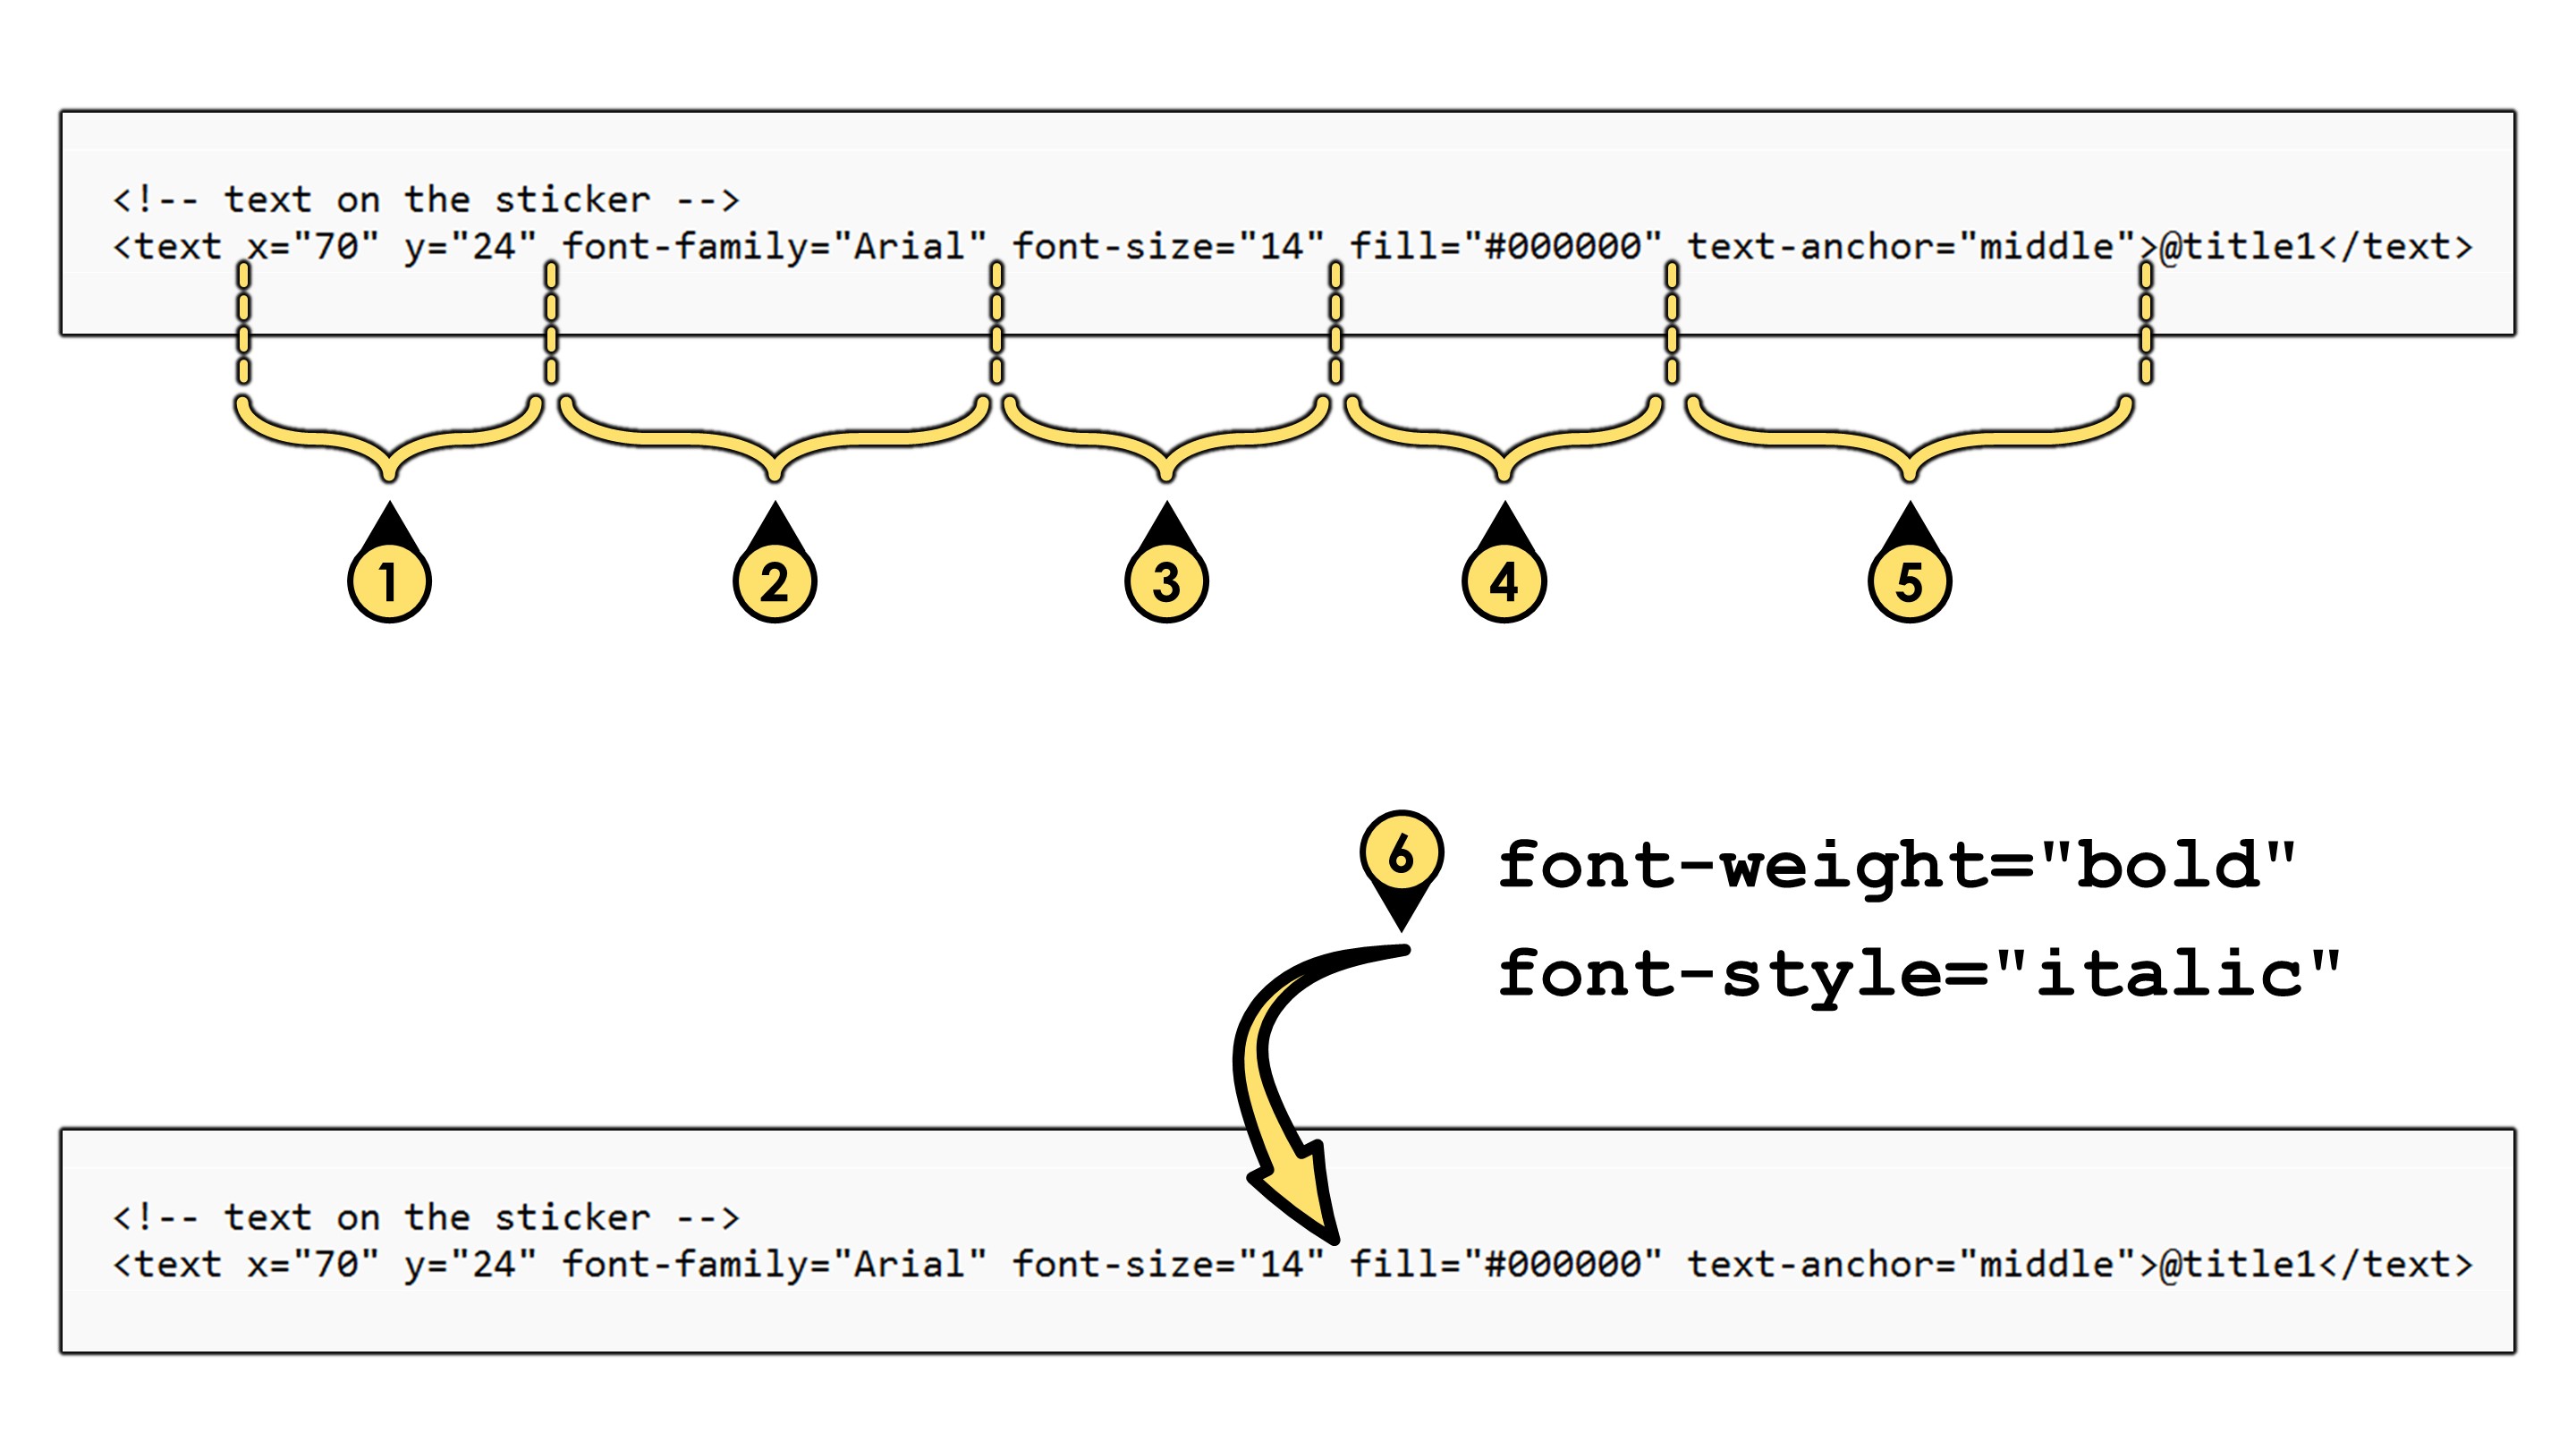
- The X and Y positions of the sticker. (X=0, and Y=0 are in the upper left of the sticker, with X-axis projecting to the right, and Y-axis projecting downward)
- The font of the text. If you want to use a font with multiple words in it's name, you need to include the spaces -- e.g.
font-family="Times New Roman" - The font size, in points.
- The color of the text, in hex format.
- The justification of the text from the X and Y Positions. in this example, the text is centered (i.e. text-anchor="middle") at position
x="70" y="24"Justification options are:
text-anchor="left" to LEFT justify the text
text-anchor="middle" to CENTER justify the text
text-anchor="end" to RIGHT justify the text - Finally, you can also add other stylings such bold or italics by adding
font-weight="bold"andfont-style="italics", as shown.